What are all the Elden Ring Nightreign bosses? These fearsome foes constitute the most challenging encounters in Limveld, but beating them is also the fastest way to get ahead before night falls. However, when every run is different in Nightreign, you need to be prepared for anything.
Several bosses in soulslike game and how to beat them.
All Nightreign Nightlord bosses
Nightlords are the most challenging bosses in Nightreign. They appear at the end of the third and final day in Limveld. Once you defeat the second day's boss, interact with the Spirit Shelter to reach the Nightlord's arena.
Here are all the Nightreign Nightlords revealed so far:
- Gladius, Beast of Night (Tricephalos)
- Adel, Baron Of Night (Gaping Jaw)
- Gnoster, Wisdom Of Night (Sentient Pest)
- Maris, Fathom Of Night (Augur)
- Libra, Creature of Night (Equilibrious Beast)
- Fulghor, Champion Of Nightglow (Darkdrift Knight)
- Caligo, Miasma Of Night (Fissure in the Fog)
- The Shape Of Night / Heolstor The Nightlord (Night Aspect)
Unlike all other encounters in Nightreign, Nightlord boss encounters are not randomized. Instead, you select the Nightlord you wish to fight at the Roundtable Hold while setting up your run. Use this knowledge to create the best build to beat it in the first two days.
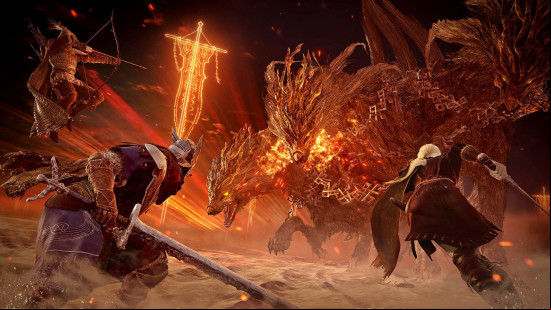
Gladius, Beast of Night
- Weakness: Holy
- Recommended class: Wylder, Guardian, Raider
Gladius, Beast of Night is the first Nightlord you'll encounter, and the one you need to defeat before you can challenge any others. This ferocious three-headed wolf begins the fight as a snapping and snarling Cerberus, but occasionally splits into three separate wolves. As one beast, your Guardian or Raider should be able to keep it occupied, but its multiple forms are exponentially harder to handle. The best strategy is for each Nightfarer to take a wolf each to control this crowd.
Aside from its swipe, leap, and bite attacks, Gladius has a sword that it continually unsheathes in its solo form. Watch for when it moves into a vertical position, and dodge or parry the overhead swing before it lands. It also loves to drag its sword across the ground, leaving a burst of flame that's far more challenging to dodge. We recommend backing off during this attack, but don't go too far. Gladius can also repurpose its sword as a long-range whip, swinging it in a wide horizontal arc before leaping forward to close the gap.
Gladius is weak to Holy damage, so keep an eye out for any weapons that drop during your run. A Faith-aligned class is preferable here, but you won't be able to unlock the Duchess or Revenant until after you defeat it for the first time. That leaves the Recluse, a very fragile class that can struggle against sustained aggression. Wylder and Guardian are your best choices here. Don't forget to bring in some consumables that negate physical and fire damage, too.
Adel, Baron of Night
- Weakness: Poison
- Recommended class: Wylder, Ironeye, Recluse
Adel, Baron of Night is a crocodilian dragon that demands careful positioning to survive its brutal rampage. Attack from behind if you need to get up close and personal, and be prepared to jump over the shockwaves it creates when it slams the ground. Watch out for when Adel rears its head back; this is the only warning sign you get before it charges forward, scooping Nightfarers into its jaws and inflicting fatal blood loss.
While this can be a finicky fight for melee classes, ranged Nightfarers like the Ironeye and Recluse can avoid Adel's highly aggressive movements altogether. They're also best positioned to inflict debilitating status ailments. Poison in particular causes Adel to vomit, locking it into a lengthy animation that leaves you free to dash in with your most powerful melee attacks without reprisal.
Adel's vomit is a corrosive substance that can cause serious harm to any Nightfarers that walk into it, so take advantage of the massive arena to lure it away. Be prepared for the lightning AoE explosions that it creates below half-health; this usually coincides with a powerful dive attack that can occur in quick succession. Stay alert, dodge often, and stay away from the pointy end.
Gnoster, Wisdom of Night
- Weakness: Fire
- Recommended class: Ironeye, Recluse, Raider
Gnoster, Wisdom of Night forces you to split your attention between a flying moth and giant scorpion. Just like when you fought Gladius, the best way to manage these two foes is by dividing their attention. Melee Nightfarers should draw the scorpion away, leaving ranged classes free to focus on the moth. The scorpion uses its massive bulk to perform stomps and slam attacks at close range, striking out with its pincers to crush players caught between them. These attacks can take a chunk out of your health, but they're also well telegraphed and easily dodged.
The moth is less immediately aggressive, but far more dangerous. It drifts through the sky, unleashing waves of magical projectiles that can be tricky to roll through – if you're finding them difficult to avoid, duck behind the scorpion to use it as a shield. The moth's poison mist can also be a deadly killer. Neutralizing Boluses can help counteract the status effect, but the parasite that deals continuous damage can only be removed by other teammates attacking it. The moth's grab attack can also do some serious damage, so watch out for it lunging down overhead.
Gnoster is one of the hardest bosses in Nightreign, but there is a reliable method to squash this bug. It's weak to fire, so stock up on Fire Grease and visit locations that drop fire weapons while you're in Limveld. Finally, be prepared for Gnoster's hyper-aggressive second phase, in which both creatures merge into one and charge forward, summoning bolts and pillars of magic as it goes. From this point on, you have to deal with both movesets simultaneously, so stay moving and keep your distance to avoid getting caught out.
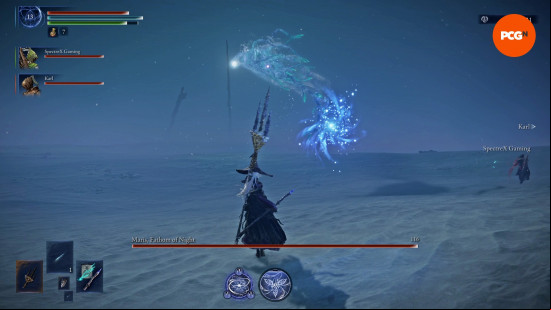
Maris, Fathom Of Night
- Weakness: Lightning
- Recommended class: Ironeye, Recluse
Maris, Fathom of Night is a squid-like entity that drifts across the battlefield, often far beyond the reach of melee attacks. Guardians and Raiders won't be of much use here; instead, this fight is where the Ironeye truly shines. You want at least one in the arena, ideally outfitted with bows that deal lightning damage for maximum damage potential.
While Maris is the least aggressive Nightreign boss, it does have a few summons up its sleeve. This includes a gaggle of jellyfish that home in on your location and explode, but they're easily avoided with a quick dodge or sprint. It also creates waves of water that cover the arena in a wide arc; to dodge forwards rather than sideways to emerge unscathed.
However, the most dangerous attack in this fight is the bomb that Maris releases into the air during its second phase. This ball of light detonates when it hits the ground, and it's essential for ranged classes to target and destroy it as soon as possible to avoid an instant wipe. You also shouldn't underestimate the power of its sleep attack, which can slowly deplete your health, flasks, and revives if left unchecked. Use your ultimate's invincibility to negate its effect, then dash in to deal some serious damage while Maris is earthbound.
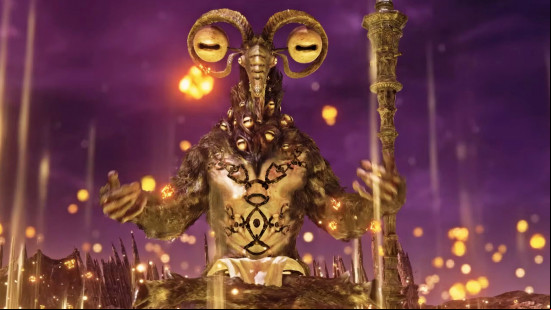
Libra, Creature of Night
- Weakness: Madness, Holy, Fire
- Recommended class: Duchess, Ironeye, Raider
Libra, Creature of Night appears throughout Limveld disguised as the Scale-bearing Merchant. It appears in this disguise for the final time in the Nightlord arena, and you can strike a deal for a legendary weapon or even additional levels. These might seem tempting if your build isn't up to scratch, but just be aware that each comes with a debuff attached. Alternatively, you can refuse altogether. No matter which you choose, the Scale-bearing Merchant transforms into Libra, Creature of Night.
In many respects, Libra is the classic get-out-of-the-fire boss challenge. It has a variety of spells that inflict Madness, including small orb projectiles, massive AoE explosions, and homing turrets. The Duchess can effortlessly use her double-dodge to dance out of the way of this barrage. Libra remains stationary when casting these attacks, which gives you the chance to back off and heal or get a couple of free hits in – just don't get greedy.
The most difficult aspect of this fight is staving off Madness. Equipment that provides bonus resistance is very helpful, but not guaranteed. Instead, look out for the crystals that Libra's spells leave behind, which reduce your Madness buildup when stepped on. Libra's attacks can seem relentless, but they're also interruptible. Raider can use Totem Stela to block projectiles, while ranged attackers can focus on its spectral shield to deny its defense buff. It's also worth mentioning that Libra is also susceptible to Madness, but this will cause it to enter a frenzied state.
When it's not busy casting spells, Libra uses its staff to bludgeon Nightfarers with thrust, swipe, and slam attacks. However, Libra's frenzied state is by far the most dangerous. Watch out for the red aura, and dodge its rapid charge and slam attacks; survival is the aim of the game during these intervals. Thankfully, there are no other enemies to give you grief during this encounter, so Guardians and Raiders should work to sustain aggro while squishier Nightfarers from a distance.
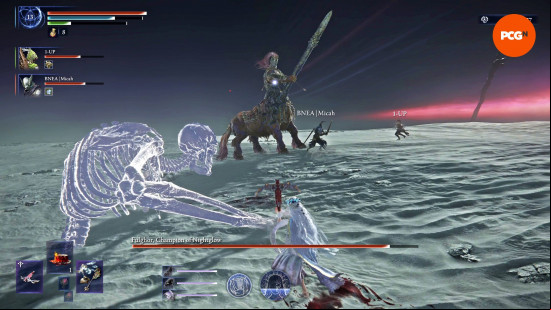
Fulghor, Champion Of Nightglow
- Weakness: Lightning
- Recommended class: Ironeye, Raider, Executor
Fulghor, Champion of Nightglow is easily one of the most difficult Nightreign bosses, and preparation is the key to victory. This centaur knight wields a lightning lance that can deal some serious damage if you're caught in it, so looting all churches in Limveld is a must.
Multiple tanks can be of great benefit in this fight since they can withstand Fulghor's aggression. The Raider has a slight edge over the Guardian since Fulghor's overhead slams and lunges can by shields. You can also use Retaliate to stagger him while he's winding up for one of his many AoEs. Totem Stela is also a good way to stop Fulghor in his tracks.
Fulghor's aggression is only matched by his speed. Ironeye can use his pinpoint accuracy to dish out a constant flurry of lightning-infused arrows, but be ready to dodge during his lengthy charge attacks. An Executor can also deflect Fulghor's attacks to break his stance and take advantage of any staggers, but this can backfire if you're not confident enough to nail those timings. Ultimately, patience and a strong frontline is what's needed to bring down this lightning lord.
Caligo, Miasma of Night
- Weakness: Fire, Blood Loss
- Recommended class: Guardian, Recluse, Raider
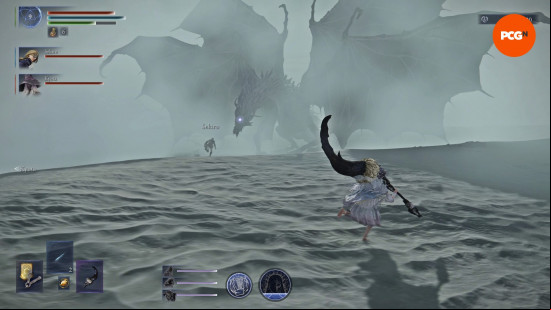
Caligo, Miasma of Night is a prehistoric ice dragon that smothers Nightfarers with its freezing breath, inflicting Frostbite to deal damage and apply a damage resistance debuff. Dragonwound Grease is a must-have to take into this fight, but Fire-based weapons and sorceries are a huge boon.
It might be tempting to hug Caligo's body as you would with other large bosses, but doing so only leaves you vulnerable to a swipe from its massive limbs. Instead, position yourself near its head to better anticipate its attacks. Targeting its head also maximizes your chances of inflicting a stagger, though melee s will find a weapon with longer reach is best to reliably land attacks. Nightfarers that can tank hits and soak up damage are best suited to this position.
Caligo is at its most dangerous when it disappears into a miasmic fog while it charges up a powerful freezing mist. Duck behind the pillars that appear on the battlefield to avoid getting caught in it. You also need to be wary of its mines, shockwaves, and freezing rain, which it summons with more regularity during its second phase.
The Shape Of Night / Heolstor The Nightlord (Night Aspect)
Weakness: Holy, Lightning, Fire
Recommended class: Raider, Guardian, Ironeye, Executor
Nightreign's final boss is split into two phases, each with its own health bar. The first phase, The Shape of Night, starts its portion of the fight lunging at Nightfarers with a single longsword until it loses about a quarter of its health, whereupon it sprouts an additional arm complete with a greatsword. Its attacks are fairly straightforward during this phase, and broadly consist of standard sword slashes and lunge attacks. The only variable is its speed. Despite its relatively slow movements, the Shape of Night can dash and teleport to instantly close the distance, so be prepared to dodge at any moment.
The Shape of Night isn't difficult in itself; the real challenge is conserving your health and flasks for the real challenge. Heolstor the Nightlord is the Night Aspect's second phase, and it begins with him wielding what is effectively the Dark Moon Greatsword, the most iconic weapon in FromSoftware's armory. He recycles the Shape of Night's moveset with more aggression. He sends arcs of magic at long-range players with a slash of his sword, and punishes close-range players with a magic AoE when he slams it into the ground.
Heolstor's attacks become more advanced as he loses health. He uses his off-hand sword as a catalyst to shroud the battlefield in darkness and send out a flurry of magic bolts from the sky. Take advantage of his complete immobility during this attack to get a few free hits in while dodging incoming damage. Once a third of his health is gone, Heolstor opens a reality rift that engulfs the battlefield in a massive AoE, which triggers geysers of golden light to continuously burst out of the ground for the rest of the battle.
From this point on, every dodge counts. Heolstor produces yet another sword, extending his close-range combo attacks that can often cause you to dodge right into a geyser. Watch out for when Heolstor leaps into the air and conserves light in his blade – this is the only warning you get before he plunges it into the ground, sending out another massive AoE that can down squishier Nightfarers instantly. Thankfully, he loses the additional sword after this devastating finisher.
High mobility and ranged attacks are the best option when going up against Heolstor, which makes Ironeye a superior pick. However, it's also vital that the expedition has a tank to pull aggro and absorb hits that would otherwise down the glass cannons in the group. Heolstor has a major weakness to Holy, so arming yourself with the most powerful elemental weapons you can find is an absolute must. You can also pick up some Holy Grease and Holy Water Pots for some supplemental damage; trust us, you'll need all the help you can get. Try to focus all your efforts on triggering a stagger with an ultimate when he's out of control.
Ultimately, Heolstor's moveset is so variable in his movements and attacks that the best class is one that you're most confident in playing. An Executor can excel at parrying his sword swings, and a Duchess can double the damage of your biggest plays. No matter which class you choose, the old soulslike rule applies: don't get greedy.
All Nightreign Night bosses
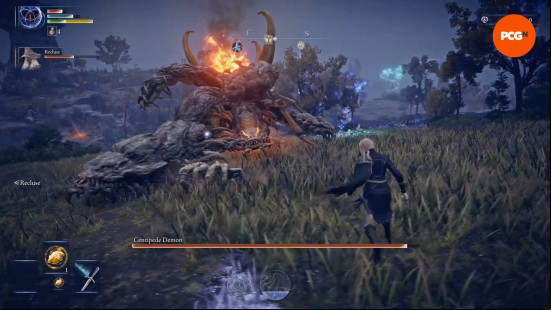
Night bosses are slightly less formidable than Nightlords but still constitute a major threat. They appear at the end of the first and second day in Limveld, and you must defeat them to progress on your run.
Night One bosses
Here are all the bosses that appear at the end of day one:
- Battlefield Commander
- Bell Bearing Hunter
- Briar Knight
- Centipede Demon
- Demi-Human Queen and Demi-Human Swordmaster
- Battlefield Commander
- Centipede Demon
- The Duke's Dear Freja
- Gaping Dragon
- Godskin Noble
- Grafted Monarch
- Night's Cavalry (Glaive) and Night's Cavalry (Flail)
- Royal Revenant
- Smelter Demon
- Tibia Mariner and Those Who Live In Death
- The Duke's Dear Freja
- Ulcerated Tree Spirit
- Valiant Gargoyle
- Wormface
Night Two bosses
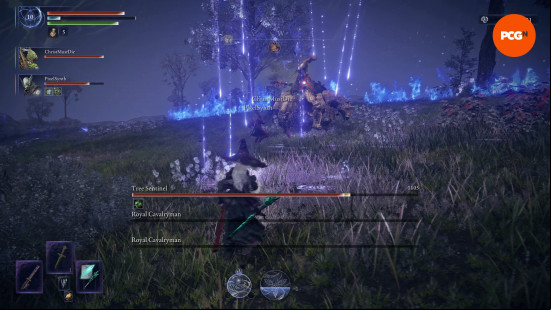
Here are all the bosses that appear at the end of day two:
- Ancient Dragon
- Crucible Knight and Golden Hippopotamus
- Dancer of the Boreal Valley
- Draconic Tree Sentinel and Royal Cavalrymen
- Fell Omen
- Frontier Commander
- Full-Grown Fallingstar Beast
- Furnace Demon
- Godskin Duo
- Great Wyrm
- Nameless King
- Nox Dragonkin Soldier
- Outland Commander
All Nightreign field bosses
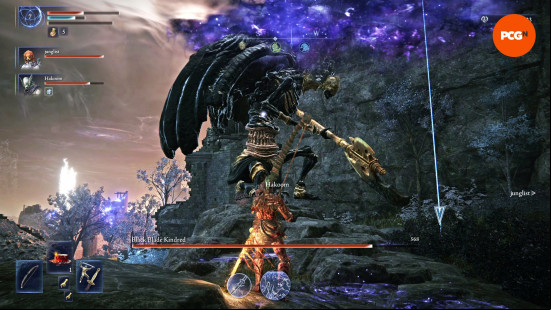
Field bosses are often found in notable locations on the Elden Ring map, such as castles, ruins, and forts. They appear during Nightreign Shifting Earth events and can be freed from Evergaols with a Stonesword Key.
Field bosses are far less powerful than Night bosses, which makes them the perfect way to level up fast. If you've cleared the major points of interest, you can find the nearest field boss by looking for the blue icon on your map.
Here are all the Nightreign field bosses:
- Abductor Virgin (Swinging Sickle)
- Albinauric Archers
- Ancient Dragon
- Ancient Heroes of Zamor
- Banished Knights
- Battlemages
- Beastmen of Farum Azula
- Bell Bearing Master
- Black Blade Kindred
- Crucible Knight
- Crystalians
- Death Rite Bird
- Demi-Human Queen
- Depraved Perfumer
- Draconic Tree Sentinel
- Elder Lion
- Erdtree Avatar
- Erdtree Burial Watchdogs
- Fallen Nightfarers
- Fire Monk
- Fire Prelate
- Flame Chariots
- Flying Dragon of the Hills
- Frenzied Flame Troll
- Godskin Duo
- Godskin Noble
- Golden Hippopotamus
- Grafted Scion
- Guardian Golem
- Leonine Misbegotten
- Lordsworn Captain
- Magma Wyrm
- Mausoleum Knight
- Miranda Blossom
- Mountaintop Ice Dragon
- Night's Cavalry
- Nameless King
- Nox Warriors
- Omen
- Oracle Envoys
- Red Wolf of the King Consort
- Redmane Knights
- Royal Army Knights
- Royal Cavalryman
- Royal Carian Knight
- Royal Revenant
- Runebear
- Sanguine Noble
- Snow Troll and Flying Dragon
- Stonedigger Troll
- The Albinaurics
- Tree Sentinel
- Troll
- Ulcerated Tree Spirit
- Valiant Gargoyle
- Wormface
All Nightreign class bosses
Most Nightreign bosses appear during an expedition, but there are a few exceptions. These class-specific bosses are only fought under special circumstances, most often to complete Nightreign Revenant.
Here are all the secret Nightreign bosses:
- Guardians of the Dew (Duchess)
- Revenant (Duchess)
- Fallen Mercenaries (Duchess)
- Stray Bloodhound Knight (Executor)
- Executor's Cry (Executor)
- Cracked Golem (Guardian)
- Night Huntsman (Ironeye)
- Onestrike Gladiator (Raider)
- Blinding Elder Lion (Raider)
- White Horn (Raider)
- Night-Swallowed Golden Hippopotamus (Recluse)
- Night Idol (Revenant)
- Corrosion (Revenant)
- Contaminant (Revenant)
- Tunnel Crystalian (Wylder)
- Mimic Troll (Wylder)
Now that you're prepared to face off against the Elden Ring Nightreign bosses, check out the Nightreign Remembrances if you consider yourself more of a scholar than a fighter.
